
CUSTOM MAGAZINE RACK
Recently I set out to create a custom magazine rack in an effort to cover up an unsightly electrical panel in the living room of my apartment. My first attempt at modeling design ideas in SketchUp proved to be very time consuming because every slight adjustment to the design required re-modeling entire portions of the geometry. Eventually I came up with the idea of building a parametric model using Dynamo that could not only explore many iterations with minimal adjustments but also could simulate materials and assembly strategies.

To begin, I created a solid form in Dynamo that reflected one of the designs I had refined during earlier studies in SketchUp. I then generated two additional solids and applied a boolean difference to carve out a mail slot on the top and a slot for magazines on the front. I set the magazine slot at an angle so that magazines could easily be inserted and the top portion of the covers would remain exposed to display their titles.

Another key consideration was how the rack would mount. I ended up settling on a 12” metal picture rail with a 1/2” front lip that could be inserted into a slot in the back of the rack and attached to the wall. To incorporate the slot, I created another solid for the void space that the picture rail would require and again used a boolean difference function to subtract from the full design.

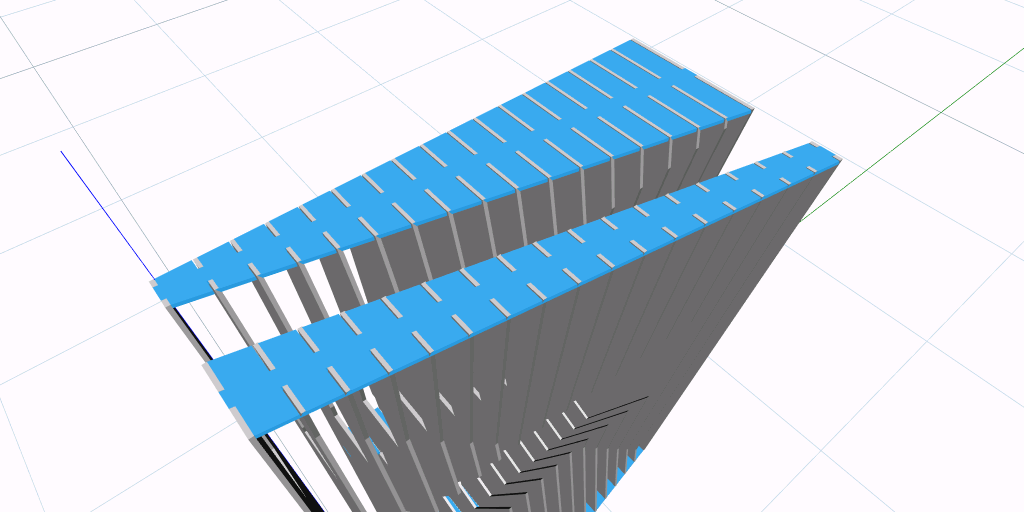
For materiality, I just so happened to have an excess supply of 1/8” thick Baltic Birch plywood lying around so I decided the form would be nicely defined by evenly spaced vertical wood fins. To simulate the wood elements in Dynamo, I created planes set perpendicular to the wall mounting surface, copied each plane 1/8” to imitate the thickness of the material, and introduced a parameter for spacing between the pieces of wood to evaluate visual density. The planes were then used to intersect the solid geometry and leave behind the isolated slices of the original form as a representation of the wood. The parametric constraints facilitated quick adjustments and counts in the Dynamo definition ensured an economy of materials by balancing the desired look with a reasonable amount of wood used.

The next step was to add cross-bracing for structural stability. End cap pieces were added to the top and bottom as well as a support piece in the center of the rack tucked alongside the picture rail. To guarantee precise and equal spacing of all the vertical baffles, intersecting geometry was subtracted and tolerances were added to interlock all the pieces together.
After all the geometry was finalized, each piece was rotated and flattened onto the same plane for export to SVG. I opened the SVG file in Adobe Illustrator and used the vector lines to laser cut all the individual components out of corrugated cardboard to construct a mock-up. The SVG file format can also be exported to a DWG or DXF from Illustrator for use in AutoCAD.


The mock-up revealed that some of the tolerances were too loose, causing the magazine rack to easily lean from side-to-side as a result of inadequate interlocking of the cross-bracing. The advantage of building a parametric model in Dynamo is that I was able to reduce the tolerances of all geometry in the model ever-so-slightly for a perfectly snug fit.


The final result was a magazine rack that serves as both functional and sculptural. This was an excellent learning opportunity for digital fabrication and most importantly provided yet another purpose for using Dynamo.
